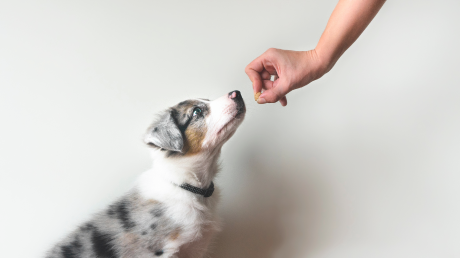
Blog Archives

A Fear Free Look at Canine Noise Aversion and Feline House Soiling

Join Amy Learn, VMD, and Valarie V. Tynes, DVM, DACVB, DACAW, as they review two behavior problems that may be seen frequently this time of year: canine noise aversions and feline house soiling.

Canine Noise Aversions

Common canine noise aversions including storm and fireworks phobias, their presenting signs, possible contributing causes, diagnosis, and suggestions for management will all be covered.

Feline House Soiling

Both urine marking and inappropriate elimination and the diagnostic criteria for differentiating the two forms of feline house soiling, as well as their different causes, management, and treatment, will be included.

Brought to you by Ceva.

Training as Enrichment: Basic Skills

Reward-based training improves the lives of dogs and their human families. You might not be able to attend group class right now, but you can “home school” your dog during this time and improve their behavior by fitting some simple training exercises into your everyday interactions with your dog. Fear Free Head Trainer Mikkel Becker will give you the basics and answer some questions, as well!

Taking Your Training Services Online

To continue helping dogs and their owners during the COVID-19 crisis, dog trainers are moving toward a variety of online training services. One of the biggest hurdles they’re facing is convincing dog owners that this new way of training their dog will be effective and lasting. Join us for a webinar with Laura Ryder, CPDT-KA, KPA CTP, as she takes a close look at online training service options and strategies to engage clients and help them train their dogs successfully.

Now You’re Here, Now You’re Not: Preparing Your Pet for Yet Another Change

First our pets had to get used to their humans being around more than usual as people sheltered in place. For many pets, this was a positive change, but even positive changes can be stressful. They’ll face upheaval again when pandemic precautions relax and people go back to their normal routines. In this webinar, Valarie V. Tynes, DVM, DACVB, DACAW, will help you determine which patients may be at an elevated risk of increased anxiety and stress due to changes in routine, and offer practical, straightforward tips that you can share with your clients for preparing these pets for a return to “normal.”

Brought to you by Ceva.

Heather E. Lewis
While the best place for a dog or a cat is a loving home, a shelter can be a lot less stressful if the design considers the social, physical, and physiological needs of each animal. One important topic for creating Fear Free spaces in a shelter is lighting. Below are some practical ideas every shelter can incorporate:

  • Sunlight Is Best. No matter what we do with artificial lighting, we cannot replace the benefits of natural sunlight. Regardless of the age and quality of your shelter, it’s possible to find ways for the pets to experience daylight. For dogs, outside play time or walks will make a positive difference for behavior and well-being. A catio can be a great addition for adoptable cats; they will enjoy sunbathing and exploring a safe outdoor environment. Even if your shelter is extremely limited, look for ways to add a glass door or a tube skylight to let in natural light. Daylight benefits:
    • Reinforces natural circadian rhythms.
    • Improves staff and volunteer productivity and mood.
    • Natural UV disinfection for spaces receiving direct sunlight.
    • Energy savings for spaces that do not need to rely on much artificial lighting.
    • Creates an environment that feels more natural.
  • Replace Fluorescent Fixtures with LED. If you’re building a new shelter, this is required by energy codes, but many people do not know to replace older fluorescent lighting in their current shelters. Fluorescent fixtures buzz and flicker, and these disturbances are more obvious to dogs and cats than to people because of the way pets see and hear. Properly designed LED lighting converts alternating current to direct current at the fixture, which eliminates buzzing and flickering. As a bonus, LED fixtures use far less energy than fluorescent ones, so lighting replacement projects pay for themselves quickly.
  • Go Dimmable. LED lighting fixtures are easy to specify with dimming controls. This is a wonderful feature as it allows shelter staff to brightly light spaces when they are being cleaned or during adoption hours, but to turn down the lights during quieter times so dogs and cats can rest more easily throughout the day.
  • Keep It Dark at Night. If it is necessary to keep a light on at night for staff safety, specify a fixture that emits red light. Because dogs and cats do not see colors on the red end of the human visible spectrum, a red light creates a darker space for pets at night, allowing them to sleep normally in the shelter.
  • Use Cool Color Temperatures. Lighting can be designed to balance beautifully with natural daylight. Fixtures that are color balanced but tuned toward cooler color “temperatures” will feel more like daylight. We specify fixtures that emit light in the 3500 – 4000 Kelvin range. These are cool but not so cold as to feel institutional. The goal is for spaces to feel clean and crisp! Be careful to specify all fixtures in a similar color temperature so they blend well together.
  • Light Adoptable Animals Well. While we like animals to rest well during non-adoption hours, we also want them to leave the shelter quickly and go to their forever homes. Adoption spaces should be lit more brightly than circulation areas where people are viewing, so the animals show well and gain the attention of potential adopters.

A good lighting design can help reduce fear, stress, and anxiety in a shelter setting and can help the pets go home more quickly. It is well worth the investment!

This article was reviewed/edited by board-certified veterinary behaviorist Dr. Kenneth Martin and/or veterinary technician specialist in behavior Debbie Martin, LVT.

Heather E. Lewis, AIA, NCARB, is a principal of Animal Arts, an architectural firm that has exclusively designed animal care facilities, including veterinary hospitals and animal shelters, for more than three decades.  She has worked on dozens of projects across the country, both large and small in her 19 years with the firm.  Heather is a member of the Fear Free℠ Advisory Board and assisted in creating the Fear Free facility standards for veterinary hospitals.  Heather is a regular contributor to various veterinary industry magazines.  She has spoken on the design of facilities for the care of animals at dozens of national and regional conferences including Fetch Hospital Design Conferences, the UC Davis Low Stress Animal Handling Conference, and the Humane Society of the United States Animal Care Expo.

Fear Free Home Spaw Days

While your favorite groomer is temporarily closed, you may need to do some basic grooming on your dog yourself. Dogs can develop problems related to brushing, mat removal, nail trims, hair in the eyes, and eye discharges in just a few weeks.

Presented by Fear Free Certified trainer and groomer Daniel Josselyn-Creighton, KPA CTP, this webinar will help you to:

  • Introduce new pieces of equipment (brushes, clippers, etc.) and procedures (baths, brushing, and nail trims) to your dog in a safe, fear-free manner.
  • Teach your dog impulse control games to help them be more comfortable sitting still for simple procedures.
  • Perform basic grooming tasks: brushing, bathing, trimming hair, and nails.
  • Use the FAS scale to know when you can continue with a procedure, when you need to proceed with caution, and when you need to stop and give your dog a break.

Pandemic Puppies: Puppy Socialization During a Disease Outbreak

Since the outbreak of COVID-19, the world has had to embrace the concept of social distancing. According to CDC regulations, all humans should remain at a safe distance of 6 feet from each other. This adds an entirely new challenge to the world of puppy socialization and training, as puppies during this period may be practicing social distancing with their owners.

Puppies should still be introduced to their “new” world in the safest ways possible (for puppy and owner). The puppy socialization period has not changed even though our world has. From 6-16 weeks, we still need to be introducing puppies to the human world while keeping ourselves safe from disease outbreak.

Presented by Rachel Lees, RVT, KPA CPT, VTS Behavior, this webinar will:

  • Educate pet owners and pet professionals on the importance of the socialization period
  • Define the terms desensitization and classical counterconditioning and how they are used during the socialization period
  • Educate pet owners and pet professionals on how to work through puppy socialization to objects, sounds, etc. during a pandemic
  • Describe safety techniques and ideas on how to have puppy socialization groups during the pandemic
  • Successfully teach a “name” orientation and recall for a skill to interrupt puppies during play groups

DIY Enrichment: Keeping Dogs from Climbing the Walls

Your clients may find themselves suddenly at home all day with their dogs, whose routine has been disrupted. How can you maintain human and canine sanity in the household and enrich dogs’ minds and bodies during this time? Fear Free Head Trainer Mikkel Becker and Education Manager Lori Chamberland offer several tips and tricks to keep canines calm and content.

Kim Campbell Thornton
Whether they are going through training or learning to overcome previous fears, dogs do best when people give them time and space, in tandem with management and—if needed—medication, to develop confidence.

Body Language Messages

I’ve been a volunteer puppy raiser for Summit Assistance Dogs for about seven years. Each year I’ve raised a pup following Summit’s training guidelines based on positive reinforcement and what puppies can handle at each developmental stage. Each pup explores the world in tiny increments based on what they tell me through body language about how the new environment feels to them. Sometimes we don’t even get out of the car if the pup seems to be hesitant. If they’re not ready for a new place, we go somewhere they have already been to build confidence. Each pup is born with unique strengths and levels of confidence. The big and bold ones move through environments more quickly than timid pups. My current pup, Jazz, came to me at 11 months of age. She was timid about change, so we moved slowly and calmly. We joined a scent work class, which allows the dogs to move freely at their own pace. This built her confidence quickly and now she rocks in almost any setting. Watching what your pet tells you through body language (relaxed, happy, withdrawn, cowering) is key to a truly Fear Free companion.

Anne Campbell, Greenbank, Washington

Muzzle, Medication, Management, Magic

Alaska is a three-and-a-half-year-old white German Shepherd, who was adopted from a pet store when she was three months old. Early veterinary visits had caused her to become fearful. Medication didn’t help and she required heavy restraint. Her pet parents called our clinic about taking her on as it had been suggested that she might prefer a female veterinarian.

We requested that they start to get Alaska comfortable with a muzzle at home and to do drop-in visits when our clinic wasn’t busy. They did all this over the course of a month. For the first visit, we asked Alaska’s previous vet to write her a prescription for Trazodone and advised her owner to give it on an empty stomach 12 hours and two hours before the exam, because of the hepatic first pass effect of the drug.

We booked out extra time for the visit. We took down preliminary info like diet, likes and dislikes, activity, allergies, etc., from mom while dad waited outside with Alaska. Her mom told us that at the previous vet, the exam room was small and that Alaska didn’t like being confined, so we pushed our rolling exam table against the counter, leaving an open space in the exam room. We had already started the lavender diffuser and Baby Einstein classical music.

To mask any hospital odor, the tech, assistant, and I washed our hands and exposed arms, dried them thoroughly, and applied Bath and Body Works Stress Relief Eucalyptus and Spearmint body lotion. The pet parents walked a muzzled Alaska into the room and we gave her space to walk and investigate. The assistant crouched to her level, and I sat on the lowered rolling table. We stretched out our arms for her to sniff….no growls! However, her ears were flat back. I called that to everyone’s attention and explained to her parents that she was wary, stressed, and afraid, and that we needed to move cautiously and slowly. As she made her rounds to us and looked us in the face, we closed our eyes or turned away, so we weren’t staring at her, while we talked to her gently and started to stroke her.

We started feeding her peanut butter, and I was able to look at her eyes from an angle, and slowly went to her ears, but she raised her lip at the otoscope, so I stopped and let her regroup. Mom then said she didn’t like ears, feet, or back touched. Eventually, Alaska’ s ears came from flat to sideways elevated to straight up. She nudged the assistant for attention, and I was able to palpate her abdomen, examine her haircoat, and auscultate her heart and lungs. The assistant continued with the peanut butter, mom with bits of chicken, and lots of neck rubs and sweet talk, and I was able to give her four vaccinations. We paused at that point, as she needed to have blood drawn for a heartworm test.

I wish I had grabbed my cell phone; Alaska was lying in the middle of the floor, back legs curled around, front feet outstretched, ears straight up, and if it weren’t for the panting, looking completely relaxed as if she were at home. The parents were amazed and happy; this had never happened before.

While they wanted to get everything done in one visit, I persuaded them that we should stop at this point so she would have a positive visit to build on. (I had squirted some alcohol on a lateral saphenous vein to see how she would take it, and while she didn’t growl, she didn’t like it, so more peanut butter to the rescue.) The owners concurred, and I had them take some Solliquin to start her on, and advised them to come back in a month. In all likelihood we will have to give some IM dexdormitor to draw the blood, but I think we can build on today’s visit. The pet parents couldn’t stop thanking us for taking the time and making the extra effort to understand their beloved dog. I love Fear Free!

Cathy Grey, DVM, Oakdale Animal Hospital, Oakdale, New York

Caring for Canasta

Canasta is fearful of strangers and handling, which makes veterinary visits difficult for both Canasta and her caregiver. I recently started working with Canasta on basket muzzle training and being more comfortable with strangers, but she was in need of bloodwork immediately. Her veterinarian prescribed pre-visit pharmaceuticals, and I worked with the technician to create a handling plan and came to the visit to assist. When Canasta walked in wearing her basket muzzle, I used gentle control to restrain her while the technician drew blood. Canasta even took a treat from the technician when we were done, which is a huge win! Her mother was crying, knowing her dog did so well, and I will continue to work on cooperative care with the caregiver and Canasta.

Tabitha Kucera RVT, CCBC, KPA-CTP, Chirrups and Chatter Cat and Dog Behavior Consulting and Training, and Lyndhurst Animal Clinic, Lyndhurst, Ohio

Want to be featured? Submit your success story here!This article was reviewed/edited by board-certified veterinary behaviorist Dr. Kenneth Martin and/or veterinary technician specialist in behavior Debbie Martin, LVT.

Kim Campbell Thornton is content manager for Fear Free Pets and is a Level 3 Fear Free Certified Professional. She has been writing about dogs, cats, wildlife, and marine life since 1985.
Rachel Lees, RVT, KPA CTP, VTS (Behavior)Consent skills, voluntary behaviors, cooperative care. Using these techniques would be a veterinary professional’s dream come true. Wouldn’t it be great if you had some hints to begin teaching these behaviors with your own patients and pets?

We want to get you started with this brief summary of how to begin to teach stationary behaviors as well as the beginning steps of teaching consent to animals. (See Part One for a full introduction to Stationary and Consent Behaviors) It’s a good idea to practice these behaviors at home with your own pets until you are comfortable and confident with the skills and techniques.

Shaping a Stationary Behavior

In part one of this blog post, it was stated that marker training and shaping techniques are the best methods to create a strong and fluent stationary behavior. When using marker training, we are allowing patients to make their own choices and learn through shaping.

Shaping is the process of “building” a behavior by successively reinforcing bits or “criteria” of the behavior that are approximations of the final behavior. The behavior is molded into the end goal by the communication the trainer gives the pet. In this situation, the communication is the marker. When the marker (tongue click, clicker, or word “click”) is audible, treats should follow. The pet learns that the last behavior performed during the marker signal earns reinforcement.

When using this technique, we must break down the behavior into achievable steps for the patient. That means having a complete picture of what the end goal behavior will look like. An example is teaching an animal to place all four feet on a mat. The moment the mat is placed on the ground, the trainer must be aware of what behaviors need to be reinforced. Listed below are steps and criteria to teach three different behaviors. Videos will accompany the criteria to demonstrate the breakdown of each step and how the learner will achieve the final goal.

Be sure you have a good understanding of the shaping plan so you can increase or decrease criteria as needed. For instance, you may need to vary criteria based on the rate at which clicking and treating occurs. Varying criteria while adding duration to behaviors is also a good idea. It gives the learner smaller points of achievement and can be gradually increased for a greater challenge. Making duration variable is more helpful than making duration progressively more difficult.

Shaping Four Paws to a Mat

The training session begins the moment the mat is placed on the ground. The trainer should observe and begin to reinforce for the following behaviors:

  • Click and Treat for head turning toward the mat
  • Click and Treat for looking in the direction of the mat
  • Click and Treat for looking directly at the mat
  • Click and Treat for weight shifting toward the mat
  • Click and Treat for moving in the direction of the mat
  • Click and Treat for placing one paw on the mat
  • Click and Treat for placing two paws on the mat
  • Click and Treat for placing three or four paws on the mat
  • Click and Treat for keeping all four feet on the mat for 1 to 2 seconds
  • Click and Treat for duration on the mat for up to 10 seconds
  • Click and Treat for duration on the mat for 20 to 30 seconds

Shaping Nose to Target Stick

Present the nose target a few inches from the animal’s nose and observe for any nose touching or interacting with the target stick. Reinforce the following pieces of behavior:

  • Click and Treat for head turning in the direction of the target stick
  • Click and Treat for looking in the direction of the target stick
  • Click and Treat for looking directly at the target stick
  • Click and Treat for weight shifting in the direction of the target stick
  • Click and Treat for moving in the direction of the target stick
  • Click and Treat for sniffing or interacting with the target stick
  • Click and Treat for consistently nose touching to the target stick
  • Click and Treat for holding the nose at the target stick for 1 second
  • Click and Treat for holding the nose at the target stick for 2-3 seconds in duration
  • Click and Treat for holding the nose at the target stick for 5-10 seconds in duration
  • Click and Treat for holding the nose at the target for 10-25 seconds in duration

Shaping Chin Rest

Begin the training session by placing a towel on the area where the animal will be resting the chin (owner’s lap, chair, stool). The trainer then observes and begins to reinforce for the following behaviors:

  • Click and Treat for head turning toward the towel location
  • Click and Treat for looking in the direction of the towel location
  • Click and Treat for looking directly at the towel location
  • Click and Treat for weight shifting toward the towel location
  • Click and Treat for moving and walking in the direction of the towel location
  • Click and Treat for sniffing or interacting with the towel location
  • Click and Treat for head movement over the towel location
  • Click and Treat for head movement down (moving head down toward the towel location)
  • Click and Treat for chin touching the towel location
  • Click and Treat for consistently chin touching to the towel location
  • Click and treat for holding duration of the chin touching behavior for 1 to 2 seconds (at the towel location)
  • Click and Treat for duration of the chin rest behavior at the towel location for 2 to 5 seconds
  • Click and Treat for duration of the chin rest behavior at the towel location for 5 to 10 seconds
  • Click and Treat for duration of the chin rest behavior at the towel location for 10 to 30 seconds

Teaching and Understanding Consent

Consent is taught by giving the patient specific criteria when they are in their stationed behavior.  When the animal steps into the stationary behavior, the veterinary team member will begin the training session using forms of desensitization and classical counterconditioning for touching parts of the patient’s body. If the patient moves out of the stationary behavior in any way, shape, or form, the training session will be discontinued. When the patient makes the choice to move back into the stationary behavior, the training session can begin.

**Video Demonstration:  Connor and Consent Mat**

Author’s Note:  A veterinary team member should be well educated in canine and feline body language before working on these procedures. The best resource for fully training these behaviors is the text “Cooperative Veterinary Care” by Alicea Howell and Monique Feyrecilde that is published by Wiley Blackwell. 

This article was reviewed/edited by board-certified veterinary behaviorist Dr. Kenneth Martin and/or veterinary technician specialist in behavior Debbie Martin, LVT.

Rachel Lees, a Level 3 Fear Free Certified Professional, is a veterinary technician specialist in behavior, a KPA certified training partner, and lead veterinary behavior technician at The Behavior Clinic in Olmsted Falls, Ohio. She loves helping people create and maintain a strong human-animal bond.