
Blog Archives

Heather E. Lewis
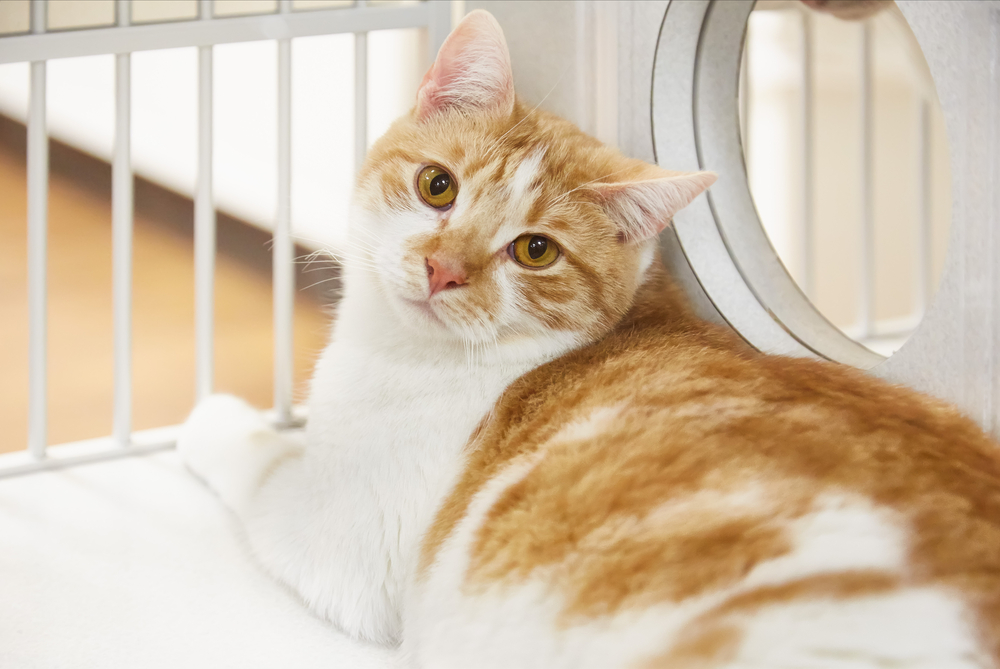
While the best place for a dog or a cat is a loving home, a shelter can be a lot less stressful if the design considers the social, physical, and physiological needs of each animal. One important topic for creating Fear Free spaces in a shelter is lighting. Below are some practical ideas every shelter can incorporate:

  • Sunlight Is Best. No matter what we do with artificial lighting, we cannot replace the benefits of natural sunlight. Regardless of the age and quality of your shelter, it’s possible to find ways for the pets to experience daylight. For dogs, outside play time or walks will make a positive difference for behavior and well-being. A catio can be a great addition for adoptable cats; they will enjoy sunbathing and exploring a safe outdoor environment. Even if your shelter is extremely limited, look for ways to add a glass door or a tube skylight to let in natural light. Daylight benefits:
    • Reinforces natural circadian rhythms.
    • Improves staff and volunteer productivity and mood.
    • Natural UV disinfection for spaces receiving direct sunlight.
    • Energy savings for spaces that do not need to rely on much artificial lighting.
    • Creates an environment that feels more natural.
  • Replace Fluorescent Fixtures with LED. If you’re building a new shelter, this is required by energy codes, but many people do not know to replace older fluorescent lighting in their current shelters. Fluorescent fixtures buzz and flicker, and these disturbances are more obvious to dogs and cats than to people because of the way pets see and hear. Properly designed LED lighting converts alternating current to direct current at the fixture, which eliminates buzzing and flickering. As a bonus, LED fixtures use far less energy than fluorescent ones, so lighting replacement projects pay for themselves quickly.
  • Go Dimmable. LED lighting fixtures are easy to specify with dimming controls. This is a wonderful feature as it allows shelter staff to brightly light spaces when they are being cleaned or during adoption hours, but to turn down the lights during quieter times so dogs and cats can rest more easily throughout the day.
  • Keep It Dark at Night. If it is necessary to keep a light on at night for staff safety, specify a fixture that emits red light. Because dogs and cats do not see colors on the red end of the human visible spectrum, a red light creates a darker space for pets at night, allowing them to sleep normally in the shelter.
  • Use Cool Color Temperatures. Lighting can be designed to balance beautifully with natural daylight. Fixtures that are color balanced but tuned toward cooler color “temperatures” will feel more like daylight. We specify fixtures that emit light in the 3500 – 4000 Kelvin range. These are cool but not so cold as to feel institutional. The goal is for spaces to feel clean and crisp! Be careful to specify all fixtures in a similar color temperature so they blend well together.
  • Light Adoptable Animals Well. While we like animals to rest well during non-adoption hours, we also want them to leave the shelter quickly and go to their forever homes. Adoption spaces should be lit more brightly than circulation areas where people are viewing, so the animals show well and gain the attention of potential adopters.

A good lighting design can help reduce fear, stress, and anxiety in a shelter setting and can help the pets go home more quickly. It is well worth the investment!

This article was reviewed/edited by board-certified veterinary behaviorist Dr. Kenneth Martin and/or veterinary technician specialist in behavior Debbie Martin, LVT.

Heather E. Lewis, AIA, NCARB, is a principal of Animal Arts, an architectural firm that has exclusively designed animal care facilities, including veterinary hospitals and animal shelters, for more than three decades.  She has worked on dozens of projects across the country, both large and small in her 19 years with the firm.  Heather is a member of the Fear Free℠ Advisory Board and assisted in creating the Fear Free facility standards for veterinary hospitals.  Heather is a regular contributor to various veterinary industry magazines.  She has spoken on the design of facilities for the care of animals at dozens of national and regional conferences including Fetch Hospital Design Conferences, the UC Davis Low Stress Animal Handling Conference, and the Humane Society of the United States Animal Care Expo.
|

Cultivating Healthy Resilience

Presented by Laurie Fonken, Ph.D., LPC, this webinar will define Compassion Fatigue and Moral Distress and acknowledge the impact they have on the professional and personal wellbeing of practitioners. We will then look at some key elements necessary to develop a healthy level of resilience, self-compassion, and self-care.

Rachel Lees, RVT, KPA CTP, VTS (Behavior)Cats are often considered a more independent, self-sufficient species compared to dogs, largely because they do not need humans to take them outside to eliminate. Most cats successfully learn to eliminate in the home by going to a litter box.

Nonetheless, feline elimination issues are one of the biggest behavioral problems clients bring to veterinarians. Often, the problem develops because human preferences regarding litter box location and type don’t match up with the desires of their feline companions.

As veterinary professionals, we must feel comfortable teaching clients what their cat wants from an elimination station. This article will review cat preferences regarding desirable locations, litter box styles, litter types, and more. This information can not only help the cat who is eliminating outside the box but can also help new kitten owners be successful from the start in setting up their new cat’s environment.

Litter Box Design and Location

Place litter boxes in safe, low-traffic areas but right off a high traffic area, so it is easily accessible. Keep them away from loud appliances such as washers and dryers, furnaces, dishwashers, air conditioners, or toilets. All these items have the potential to frighten the cat with unexpected sounds, interrupting the normal elimination pattern.  An example of a safe, quiet location is a spare bedroom or bathroom that is rarely entered.

Many commercial products also offer “hidden” locations where cats can eliminate, disguised as planters or side tables, for instance. Although this hides the litter box from the human, it may also place it in a higher traffic location. Keep this in mind when giving recommendations on litter box placement.  Everyone prefers privacy for elimination, even cats.

Litter box design preferences differ from cat to cat and human to human. Most cats prefer an open litter box. Most cat owners prefer a covered litter box. Covered litter boxes may trap odors and make the human environment smell better but for those reasons they may not be as desirable for the cat. If boxes are not cleaned regularly, the odor may be aversive to them.

Most commercial open litter boxes are too small for the average cat. The size of the litter box should be one and a half times the length of the cat’s body. Most veterinary behavior teams recommend using storage containers, Tupperware bins, dog litter boxes, or cement mixing pans.  It is also important to find out if litter box sides are low enough for the cat to jump in without injury or pain. Using a litter box that cleans itself is typically not recommended as the sounds and machinery can scare the cat.

Litter Preferences

Many different types of litters are on the market: scented, unscented, clumping, non-clumping, wheat, newspaper, sawdust, pine, and more. A study by veterinary behaviorist Jacqueline C. Neilson DVM, DACVB, found that cats generally prefer unscented clumping litter beneath their paws. And although scented litters may be more desirable to humans, cats often disdain them.  Cats are far more sensitive to odors than humans. Keep in mind as well that crystal-like litter can feel unpleasant to sensitive paws. When the cat eliminates the crystals can “pop,” causing a startling sound. Recommend giving cats the most preferable substrate—a plain, unscented litter—to set them up for success.

Since Flushing Isn’t an Option: Cleaning Tips

Litter boxes should be scooped once or twice daily. Cats prefer a clean location to eliminate.  When boxes are not cleaned at least once daily, this can cause an aversion as the cat may not want to step and eliminate in a litter box filled with yesterday’s urine clumps and stool piles.  Most humans would not desire this either.

To make boxes as attractive as possible, they should be emptied, cleaned with a mild, unscented detergent, and refilled with fresh litter at least once a month. Avoid cleaning the box with strongly scented cleanser.

Recommendations for Multi-Cat Homes

Design, location, cleaning, and substrate preferences are identical, but in homes with more than one cat, owners should provide one box for each cat, plus one extra. Place boxes on separate floors and rooms of the home to prevent one cat from blocking access to a box.

Keep in mind as well that using covered boxes in multi-cat homes can create increased anxiety if one cat is a stalker. If victim cats venture into the box to eliminate, they cannot see if the stalker cat is creeping up on them. If there is low-level aggression between the cats, and the victim cat is attacked when coming out of the box, the experience can create litter box aversion. For this reason, open litter boxes should be recommended in multi-cat homes.

Remember: It’s a cat’s world. We just live in it!

Author’s Note:  Elimination out of the box is not always a behavioral concern and can very well be a medical cry for help. It is always important to rule out a medical condition before blaming behavior. Every patient who eliminates out of the box should be examined by a veterinarian and medically worked up (CBC/Chem/UA) before specific recommendations are made. 

This article was reviewed/edited by board-certified veterinary behaviorist Dr. Kenneth Martin and/or veterinary technician specialist in behavior Debbie Martin, LVT.

Rachel Lees, a Level 3 Fear Free Certified Professional, is a veterinary technician specialist in behavior, a KPA certified training partner, and lead veterinary behavior technician at The Behavior Clinic in Olmsted Falls, Ohio. She loves helping people create and maintain a strong human-animal bond.

Pandemic Puppies: Puppy Socialization During a Disease Outbreak

Since the outbreak of COVID-19, the world has had to embrace the concept of social distancing. According to CDC regulations, all humans should remain at a safe distance of 6 feet from each other. This adds an entirely new challenge to the world of puppy socialization and training, as puppies during this period may be practicing social distancing with their owners.

Puppies should still be introduced to their “new” world in the safest ways possible (for puppy and owner). The puppy socialization period has not changed even though our world has. From 6-16 weeks, we still need to be introducing puppies to the human world while keeping ourselves safe from disease outbreak.

Presented by Rachel Lees, RVT, KPA CPT, VTS Behavior, this webinar will:

  • Educate pet owners and pet professionals on the importance of the socialization period
  • Define the terms desensitization and classical counterconditioning and how they are used during the socialization period
  • Educate pet owners and pet professionals on how to work through puppy socialization to objects, sounds, etc. during a pandemic
  • Describe safety techniques and ideas on how to have puppy socialization groups during the pandemic
  • Successfully teach a “name” orientation and recall for a skill to interrupt puppies during play groups

Fear Free Certified Practice Town Hall – April 16, 2020

Please join us for our first-ever Fear Free Certified Practice Town Hall, hosted by Fear Free founder, Dr. Marty Becker. Based on your feedback, we’ve put together an intimate panel of experts to address your concerns during these unprecedented and ever changing times.

Join Dr. Becker as he chats with Gary Landsberg, DVM, DACVB, DECAWBM (CA); Jessica Benoit, RVT, CPDT-KA, KPA CTP; and Laurie Fonken, PhD, LPC, licensed psychotherapist, and director of counseling and wellness programs for the College of Veterinary Medicine and Biomedical Sciences at Colorado State University.

Dr. Landsberg will be discussing:
– Separating pets and owners: what you need to know
– Better living through chemicals: anti-anxiety and sedation options for preventing and alleviating fear, anxiety, and stress

Jessica Benoit will be discussing:
– Keeping Fear Free top of mind in difficult situations
– Exam room preparation
– Body language: yours and theirs

And Dr. Fonken will be discussing:
– Top challenges to personal self-care
– How to care for your emotional wellbeing in an ever-changing and unpredictable environment

You must be a Fear Free Certified Practice member and logged in to view this webinar

DIY Enrichment: Keeping Dogs from Climbing the Walls

Your clients may find themselves suddenly at home all day with their dogs, whose routine has been disrupted. How can you maintain human and canine sanity in the household and enrich dogs’ minds and bodies during this time? Fear Free Head Trainer Mikkel Becker and Education Manager Lori Chamberland offer several tips and tricks to keep canines calm and content.

Kim Campbell Thornton
Whether they are going through training or learning to overcome previous fears, dogs do best when people give them time and space, in tandem with management and—if needed—medication, to develop confidence.

Body Language Messages

I’ve been a volunteer puppy raiser for Summit Assistance Dogs for about seven years. Each year I’ve raised a pup following Summit’s training guidelines based on positive reinforcement and what puppies can handle at each developmental stage. Each pup explores the world in tiny increments based on what they tell me through body language about how the new environment feels to them. Sometimes we don’t even get out of the car if the pup seems to be hesitant. If they’re not ready for a new place, we go somewhere they have already been to build confidence. Each pup is born with unique strengths and levels of confidence. The big and bold ones move through environments more quickly than timid pups. My current pup, Jazz, came to me at 11 months of age. She was timid about change, so we moved slowly and calmly. We joined a scent work class, which allows the dogs to move freely at their own pace. This built her confidence quickly and now she rocks in almost any setting. Watching what your pet tells you through body language (relaxed, happy, withdrawn, cowering) is key to a truly Fear Free companion.

Anne Campbell, Greenbank, Washington

Muzzle, Medication, Management, Magic

Alaska is a three-and-a-half-year-old white German Shepherd, who was adopted from a pet store when she was three months old. Early veterinary visits had caused her to become fearful. Medication didn’t help and she required heavy restraint. Her pet parents called our clinic about taking her on as it had been suggested that she might prefer a female veterinarian.

We requested that they start to get Alaska comfortable with a muzzle at home and to do drop-in visits when our clinic wasn’t busy. They did all this over the course of a month. For the first visit, we asked Alaska’s previous vet to write her a prescription for Trazodone and advised her owner to give it on an empty stomach 12 hours and two hours before the exam, because of the hepatic first pass effect of the drug.

We booked out extra time for the visit. We took down preliminary info like diet, likes and dislikes, activity, allergies, etc., from mom while dad waited outside with Alaska. Her mom told us that at the previous vet, the exam room was small and that Alaska didn’t like being confined, so we pushed our rolling exam table against the counter, leaving an open space in the exam room. We had already started the lavender diffuser and Baby Einstein classical music.

To mask any hospital odor, the tech, assistant, and I washed our hands and exposed arms, dried them thoroughly, and applied Bath and Body Works Stress Relief Eucalyptus and Spearmint body lotion. The pet parents walked a muzzled Alaska into the room and we gave her space to walk and investigate. The assistant crouched to her level, and I sat on the lowered rolling table. We stretched out our arms for her to sniff….no growls! However, her ears were flat back. I called that to everyone’s attention and explained to her parents that she was wary, stressed, and afraid, and that we needed to move cautiously and slowly. As she made her rounds to us and looked us in the face, we closed our eyes or turned away, so we weren’t staring at her, while we talked to her gently and started to stroke her.

We started feeding her peanut butter, and I was able to look at her eyes from an angle, and slowly went to her ears, but she raised her lip at the otoscope, so I stopped and let her regroup. Mom then said she didn’t like ears, feet, or back touched. Eventually, Alaska’ s ears came from flat to sideways elevated to straight up. She nudged the assistant for attention, and I was able to palpate her abdomen, examine her haircoat, and auscultate her heart and lungs. The assistant continued with the peanut butter, mom with bits of chicken, and lots of neck rubs and sweet talk, and I was able to give her four vaccinations. We paused at that point, as she needed to have blood drawn for a heartworm test.

I wish I had grabbed my cell phone; Alaska was lying in the middle of the floor, back legs curled around, front feet outstretched, ears straight up, and if it weren’t for the panting, looking completely relaxed as if she were at home. The parents were amazed and happy; this had never happened before.

While they wanted to get everything done in one visit, I persuaded them that we should stop at this point so she would have a positive visit to build on. (I had squirted some alcohol on a lateral saphenous vein to see how she would take it, and while she didn’t growl, she didn’t like it, so more peanut butter to the rescue.) The owners concurred, and I had them take some Solliquin to start her on, and advised them to come back in a month. In all likelihood we will have to give some IM dexdormitor to draw the blood, but I think we can build on today’s visit. The pet parents couldn’t stop thanking us for taking the time and making the extra effort to understand their beloved dog. I love Fear Free!

Cathy Grey, DVM, Oakdale Animal Hospital, Oakdale, New York

Caring for Canasta

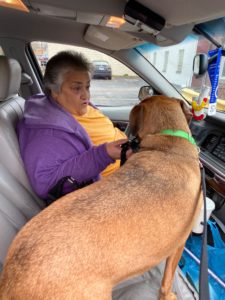
Canasta is fearful of strangers and handling, which makes veterinary visits difficult for both Canasta and her caregiver. I recently started working with Canasta on basket muzzle training and being more comfortable with strangers, but she was in need of bloodwork immediately. Her veterinarian prescribed pre-visit pharmaceuticals, and I worked with the technician to create a handling plan and came to the visit to assist. When Canasta walked in wearing her basket muzzle, I used gentle control to restrain her while the technician drew blood. Canasta even took a treat from the technician when we were done, which is a huge win! Her mother was crying, knowing her dog did so well, and I will continue to work on cooperative care with the caregiver and Canasta.

Tabitha Kucera RVT, CCBC, KPA-CTP, Chirrups and Chatter Cat and Dog Behavior Consulting and Training, and Lyndhurst Animal Clinic, Lyndhurst, Ohio

Want to be featured? Submit your success story here!This article was reviewed/edited by board-certified veterinary behaviorist Dr. Kenneth Martin and/or veterinary technician specialist in behavior Debbie Martin, LVT.

Kim Campbell Thornton is content manager for Fear Free Pets and is a Level 3 Fear Free Certified Professional. She has been writing about dogs, cats, wildlife, and marine life since 1985.
Rachel Lees, RVT, KPA CTP, VTS (Behavior)Consent skills, voluntary behaviors, cooperative care. Using these techniques would be a veterinary professional’s dream come true. Wouldn’t it be great if you had some hints to begin teaching these behaviors with your own patients and pets?

We want to get you started with this brief summary of how to begin to teach stationary behaviors as well as the beginning steps of teaching consent to animals. (See Part One for a full introduction to Stationary and Consent Behaviors) It’s a good idea to practice these behaviors at home with your own pets until you are comfortable and confident with the skills and techniques.

Shaping a Stationary Behavior

In part one of this blog post, it was stated that marker training and shaping techniques are the best methods to create a strong and fluent stationary behavior. When using marker training, we are allowing patients to make their own choices and learn through shaping.

Shaping is the process of “building” a behavior by successively reinforcing bits or “criteria” of the behavior that are approximations of the final behavior. The behavior is molded into the end goal by the communication the trainer gives the pet. In this situation, the communication is the marker. When the marker (tongue click, clicker, or word “click”) is audible, treats should follow. The pet learns that the last behavior performed during the marker signal earns reinforcement.

When using this technique, we must break down the behavior into achievable steps for the patient. That means having a complete picture of what the end goal behavior will look like. An example is teaching an animal to place all four feet on a mat. The moment the mat is placed on the ground, the trainer must be aware of what behaviors need to be reinforced. Listed below are steps and criteria to teach three different behaviors. Videos will accompany the criteria to demonstrate the breakdown of each step and how the learner will achieve the final goal.

Be sure you have a good understanding of the shaping plan so you can increase or decrease criteria as needed. For instance, you may need to vary criteria based on the rate at which clicking and treating occurs. Varying criteria while adding duration to behaviors is also a good idea. It gives the learner smaller points of achievement and can be gradually increased for a greater challenge. Making duration variable is more helpful than making duration progressively more difficult.

Shaping Four Paws to a Mat

The training session begins the moment the mat is placed on the ground. The trainer should observe and begin to reinforce for the following behaviors:

  • Click and Treat for head turning toward the mat
  • Click and Treat for looking in the direction of the mat
  • Click and Treat for looking directly at the mat
  • Click and Treat for weight shifting toward the mat
  • Click and Treat for moving in the direction of the mat
  • Click and Treat for placing one paw on the mat
  • Click and Treat for placing two paws on the mat
  • Click and Treat for placing three or four paws on the mat
  • Click and Treat for keeping all four feet on the mat for 1 to 2 seconds
  • Click and Treat for duration on the mat for up to 10 seconds
  • Click and Treat for duration on the mat for 20 to 30 seconds

Shaping Nose to Target Stick

Present the nose target a few inches from the animal’s nose and observe for any nose touching or interacting with the target stick. Reinforce the following pieces of behavior:

  • Click and Treat for head turning in the direction of the target stick
  • Click and Treat for looking in the direction of the target stick
  • Click and Treat for looking directly at the target stick
  • Click and Treat for weight shifting in the direction of the target stick
  • Click and Treat for moving in the direction of the target stick
  • Click and Treat for sniffing or interacting with the target stick
  • Click and Treat for consistently nose touching to the target stick
  • Click and Treat for holding the nose at the target stick for 1 second
  • Click and Treat for holding the nose at the target stick for 2-3 seconds in duration
  • Click and Treat for holding the nose at the target stick for 5-10 seconds in duration
  • Click and Treat for holding the nose at the target for 10-25 seconds in duration

Shaping Chin Rest

Begin the training session by placing a towel on the area where the animal will be resting the chin (owner’s lap, chair, stool). The trainer then observes and begins to reinforce for the following behaviors:

  • Click and Treat for head turning toward the towel location
  • Click and Treat for looking in the direction of the towel location
  • Click and Treat for looking directly at the towel location
  • Click and Treat for weight shifting toward the towel location
  • Click and Treat for moving and walking in the direction of the towel location
  • Click and Treat for sniffing or interacting with the towel location
  • Click and Treat for head movement over the towel location
  • Click and Treat for head movement down (moving head down toward the towel location)
  • Click and Treat for chin touching the towel location
  • Click and Treat for consistently chin touching to the towel location
  • Click and treat for holding duration of the chin touching behavior for 1 to 2 seconds (at the towel location)
  • Click and Treat for duration of the chin rest behavior at the towel location for 2 to 5 seconds
  • Click and Treat for duration of the chin rest behavior at the towel location for 5 to 10 seconds
  • Click and Treat for duration of the chin rest behavior at the towel location for 10 to 30 seconds

Teaching and Understanding Consent

Consent is taught by giving the patient specific criteria when they are in their stationed behavior.  When the animal steps into the stationary behavior, the veterinary team member will begin the training session using forms of desensitization and classical counterconditioning for touching parts of the patient’s body. If the patient moves out of the stationary behavior in any way, shape, or form, the training session will be discontinued. When the patient makes the choice to move back into the stationary behavior, the training session can begin.

**Video Demonstration:  Connor and Consent Mat**

Author’s Note:  A veterinary team member should be well educated in canine and feline body language before working on these procedures. The best resource for fully training these behaviors is the text “Cooperative Veterinary Care” by Alicea Howell and Monique Feyrecilde that is published by Wiley Blackwell. 

This article was reviewed/edited by board-certified veterinary behaviorist Dr. Kenneth Martin and/or veterinary technician specialist in behavior Debbie Martin, LVT.

Rachel Lees, a Level 3 Fear Free Certified Professional, is a veterinary technician specialist in behavior, a KPA certified training partner, and lead veterinary behavior technician at The Behavior Clinic in Olmsted Falls, Ohio. She loves helping people create and maintain a strong human-animal bond.
Rachel Lees, RVT, KPA CTP, VTS (Behavior)Most of us became veterinary professionals because of our fondness for animals. Our goal is to assist them in times of need and to be their voice when they are unable to articulate their desires.

Unfortunately, our patients don’t always understand that. Most of our patients are not overjoyed about their trip to the veterinary practice. Even though we are here to help them live long, healthy, happy lives, they see our clinic as the place where they may be poked, touched inappropriately, and sometimes scared, even if this is not our intention.

Wouldn’t it be fantastic if we could communicate with our patients the way we can with humans? If they had the opportunity to say “Yes” or “No” to being injected or touched before resorting to a growl, bite, or air snap? Teaching strong stationary behaviors and using them as a consent cue can be useful and can take your veterinary team to the next level.

Stationary Behaviors

These behaviors cue the animal to stand, lie down, or touch a body part to a specific location for a duration of time. They are typically taught outside the veterinary setting using marker training and shaping techniques*. Once the patient is comfortable performing the stationary behavior in a non-stressful setting, training sessions can begin to take place at the veterinary practice. The patient should enjoy training and interacting with the stationary behavior as this is the place where most veterinary husbandry behaviors will be performed in the future. The patient should associate this location with reinforcements such as high-value food and fun. Stationing behaviors include but are not limited to the following:

  • Body Target to Mat
    • Four paws on the Mat
    • Lying in Sternal Recumbency on the Mat
    • Lying in Lateral Recumbency on the Mat
  • Nose Target to a Hand or Object
  • Chin Rest
  • Paw Target to an Object

What Is Consent?

Once the above behaviors have been taught and the patient is 100 percent responsive in the veterinary practice, the concept of consent can begin. Consent allows the patient to choose to engage in training with the owner and veterinary team members by responding to the cued behavior and allowing the procedure to be performed. If the patient does not want to interact, they will send a clear signal that they are uncomfortable and are unable to perform the stationary behavior at the given time.

The goal with consent is to give patients some control by allowing them to make choices to reduce fear, anxiety, and stress, increase comfort, and increase the animal’s ability to cooperate. It is important to fully understand the patient’s body language and to understand that not responding to the cued behavior is not the patient being “stubborn.” If the patient is reluctant to stay in the cued stationary behavior, assess the patient and yourself, and then end the training session or veterinary visit. Remember that animals use avoidance behaviors such as displacement or conflict when a situation becomes stressful. Our goal is to give the animal a choice and to respect that choice.

Examples of avoidance behaviors:

  • Sniffing the ground
  • Not responding to a well-known station behavior
  • Yawning
  • Lip licking
  • Slow response to a station behavior
  • Head turning away
  • Weight shifting away

Final Note

If taught correctly, stationary behaviors can be an asset to any veterinary team. Any veterinary team member who is interested in teaching these protocols should consider training the patient ahead of time to wear a basket muzzle as we are teaching voluntary veterinary care. The patient can and will still say that they are uncomfortable if they are pushed too far above their comfort level. A veterinary team member should be well educated in canine and feline body language before working on these procedures. The best resource for fully teaching these behaviors is the text “Cooperative Veterinary Care” by Alicea Howell and Monique Feyrecilde, published by Wiley Blackwell.

*Shaping will be discussed in Part Two

This article was reviewed/edited by board-certified veterinary behaviorist Dr. Kenneth Martin and/or veterinary technician specialist in behavior Debbie Martin, LVT.

Rachel Lees, a Level 3 Fear Free Certified Professional, is a veterinary technician specialist in behavior, a KPA certified training partner, and lead veterinary behavior technician at The Behavior Clinic in Olmsted Falls, Ohio. She loves helping people create and maintain a strong human-animal bond.